Sunday, January 30, 2011

ETC_Final Project

Relevant and Innovative Learning Scenarios Plan

For my Emergent Technologies in a Collaborative Culture class, we created a Relevant Innovative Learning Scenario. This is my plan and a video showing how it was implemented into my classroom.

Target Audience: 9-12 grade photography 1 and 2 students. My classes are diverse including students of various grade and ability levels in the same class period.

Materials: cameras, computers with Internet connection, project directions, projector

Objectives: Student will create an Edmodo account with 80% mastery. Student will photograph a given theme with 80% mastery. Student will critique the work of a fellow student using Edmodo with 80% mastery.

Procedure: Students will photograph 20 pictures that represent who they are as a person. The photographs will be saved to the student’s folder on our school server. The student will choose one photograph to upload to Edmodo for critique. Each student must critique two other classmates’ photographs.

Web 2.0 Tool: Edmodo. Edmodo works just like Facebook for the classroom. Students can create posts, upload files, and have discussions. The site is completely private and students only need a group code, user name, and password to register.

Social Participation/Social Learning: Students will collaborate to critique the work of their peers. I hope that students will gain valuable insight into their own work as part of an effort to improve the work of the entire class. Most of my students already enjoy talking about each other’s work. I am hoping some of the quieter students will have another option to express their viewpoints.

Making Connections: Students will use previous knowledge about how the camera works to take new photographs. Since the semester just started, I usually start with something relatively easy to accomplish then build from there. Students will gain new knowledge in critique techniques and contribute to improving the work of fellow classmates. If the site is successful, I can use it for more than just critiques.

Create/Produce: Students are creating a body of photographic work. The Edmodo site will give students the capability to share their work with other photography students.

Reflection: Students will be asked to reflect on the experience through the daily classroom journals. Students will analyze their experience using Edmodo and provide suggestions about what is or is not working.

Monday, January 24, 2011

PE5_Edmodo

My students are going to begin using the social networking site, Edmodo later this week. I have created a group for each class period. One of the best features of Edmodo is the ability to send a message to designated groups. I can type one message and send it to one class or all of my classes simply by designating the group recipient in the send box.


Edmodo also has built in assignment template. You can post assignment directions complete with due dates.


You can also create polls to send to your group. This option would be great for checking understanding through a short quiz.


Teachers have the ability to connect with other teachers through the Connection option. This screen shows a connection I made with a fellow teacher at my school.


My students are going to create their accounts later this week. They will create accounts using the group code. Then they will add profile pictures and upload photographs to be critiqued by fellow classmates. As part of the final project for Emergent Technologies in a Collaborative Culture, I plan to document my students’ journey using Edmodo. If this assignment is well received I plan to use Edmodo for more through out the semester.

Tuesday, January 18, 2011

PE4_Edmodo

I have decided to focus my RILS project around Edmodo. I previously was working with Wikispaces to create an online community. One of the biggest drawbacks of that tool was the lack of ability to comment on another person’s page. I wanted the tool to act as a forum for my students to post their photographs and create discussions. Students could upload their photographs to Wikispaces as part of the new page function but they could not make comments anywhere except in the discussion forum. The discussion forum would not allow users to upload files. This led me to think about what I would want in my theoretical perfect web 2.0 tool. I began to realize that what I wanted was facebook in my classroom. The benefits of facebook are the ability to create new discussion posts that automatically get sent to a group of friends, the ability to upload photographs, and comment on any files or updates posted to the site. Of course facebook is not accepted as an educational tool by my school district. In fact, the website is blocked from all district-owned computers. After a bit of research, I came across Edmodo. This site is a classroom collaboration site the works just like facebook but it is set up to be accessed privately. Teachers can create groups for each of their classes. The site will give you a group access code to give to your students. Students create a username and password then enter the group code. Students do not need to enter an email address to register. I felt that was a huge benefit. Once into the site, students can upload a photo for their profile. As you can see from the photos below, the screen organization looks similar to facebook. Both the teacher and students can create new posts including files, photos, or links. The teacher and students can send private messages to each other but students cannot send private messages to other students. No one can access the class page without registering using the group code so the site is completely private. I am excited to implement this into my classroom.


Sunday, January 16, 2011

Saturday, January 15, 2011

PE3_Final Cut Pro 7


I finished the last section of my tutorials today.  This was the creative part of editing with Final Cut Pro 7.  The tutorials went over adding titles, adding markers, importing and exporting files, using filters, adding transitions, and changing the speed of clips.  It was very informative and I learned how get the clips to act and look the way I wanted them to.  I feel like I know much more about using Final Cut Pro 7.  It was definitely worth the time it took to go through the tutorials.  Now on to my commercial...

Friday, January 14, 2011

PE2_Final Cut 7

For the second part of my Final Cut tutorials, I learned advanced editing techniques including the slip and slide tools, how to set your keyboard shortcuts, color coordinating your clips, changing the way you see your timeline, adjusting audio, and editing to smooth transitions through the footage.  The slip and slide tools allow you to edit clips already placed in your timeline.  The slip tool allows you to adjust the start and stop points of a clip.  Because Final Cut allows you to trim your footage but is not destructive, you can change the footage within a time frame without changing the length of your video clip. This is useful for editing out undesired parts of a clip.  The slide tool allows you to add footage to a clip.  This tool also changes the length of the final video.  The keyboard in Final Cut is completely adjustable.  You can change what keys are assigned shortcuts to fit your preferences.  Any shortcuts you assign appear in the menus next to the command.  The color and image size of the clips in the timeline can be adjusted to aid in organizing your work.  The audio can be separated from the video clip so that you can add other video images while keeping the main audio track.  The tutorial stressed using breaks or adjusting transitions to hide awkward video footage such as some one saying, “um.”  These areas can be smoothed over through changing the scene, adjusting the audio, or using a transition to hide the breaks and create separate scenes.  Tomorrow, I will finish the tutorials and begin creating my commercial.


Wednesday, January 12, 2011

Personal Thoughts-Seating Charts

Through out this program, I have noticed that I am changing the way I think and feel about my classroom.  I just started second semester this week with new classes.  It is like the first day of school all over again.  Every first day at the beginning of the semester, I create an alphabetical seating chart to project the first day.  I do this mainly so that I can get to know everyone's names and to create a controlled environment.  When I was studying to become a teacher, I remember reading a book about classroom management that said seating charts tell your students who is in control from the first day.  This semester I began to question why I did this after a few students asked my individually if they could change seats so that they could see better.  I was more than happy to accommodate their preferences.  The situation got me thinking and trying to remember what it was like to have someone tell me where to sit.  I remembered a time when I was placed sitting next to this boy. (We were both kids in school then.)  He was very nice and polite but he would constantly tap his foot which made the desk wobble.  It drove me crazy!  I would be writing and the desk would be shaking.  The seating chart had created a situation where it hindered my ability to pay attention to the teacher.   I wouldn't want to put one of my students in the same situation.  I have decided to allow my students to choose their own seats.  Since I have an intern coming into my class this semester,  I am going to allow my students to choose their seats after spring break.  Mostly because if this fails, I don't want my poor intern to have to work with my mess.  We'll see what happens.

BP6_Comments on Heidi's Blog

Follow this link to Heidi's blog discussing the PlanbookEdu web tool. 

BP5_Comments on Stephania's Blog

Follow this link to my comments on Stephania's blog about Twiducate.

PE1_Final Cut Pro 7

Video has become something I have enjoyed working with over the course of this program. I have been working with photography for years but never ventured into video.  I like using the camera along with audio to express my thoughts.  While working on the videos for last class in iMovie, I became frustrated with the lack of control I had in editing my video footage.  I wanted more control over the transitions, color correction, and adding moving graphics.  I feel that beginner consumer software generally is easy to use but in the process of making it easy, most of the control over the finished product is lost. (I could go on and on about this. Photoshop versus iPhoto.  InDesign versus Pages, etc.) I looked to professional video editing software to allow me to create my vision.  Half-way through the last class, I began to work with Final Cut Pro 7.  I asked for permission to complete the video tutorials on Lynda.com for Final Cut Pro 7 instead of iMovie so that I can learn more about using this program.  I have completed about 1/3 of the tutorials.  So far most of the information has been very basic but I did learn several different ways to advance footage, create in and out points, and keyboard shortcuts.  I begin the Advanced Editing section tonight.  I am excited to see where this takes me.


Here is a screen shot of my tutorial project and the Final Cut interface.


Monday, January 10, 2011

BP4_Photo Peach


I chose http://photopeach.com for my second web 2.0 tool review.  Since I teach photography, I am always trying to find new ways for my students to present their work.  I have been having my students create portfolios of their best work using Adobe Bridge.  One of the benefits of using Adobe Bridge is that the entire portfolio is saved as a PDF file making it easy to email.  One of the biggest drawbacks is the lack of ability to add music and create slideshows.  Photo Peach solves both of these problems and is easy to use.


After you log in to the screen, click on the Upload Photos icon at the top of the screen.
 

Select the photos you would like to upload by navigating to the folder where they are located.  Hold the shift button while you click on the files you would like to select.  Click the Open icon.


The website will automatically take you to the Quick Upload Step 1.  From here, you can change the order of your photographs by clicking and dragging the photos in the order you would like.  One drawback to using this site is the lack of ability to rotate photographs.  (This bothers me a bit.  The files had the correct orientation when they were uploaded.  I even tried to rotate photos in Adobe Photoshop.)  Click Next.


The next screen is the Quick Upload Step 2.  You can develop a title for your slideshow, change the slideshow speed, and add captions to the photographs.  You can add music by choosing from lists of available music sources or upload music files.  Then click the Create icon to finish the slideshow.


You can also add a multiple choice quiz option by choosing to edit the slideshow.  You can add a question and up to three possible answers.  


Once the slideshow is complete, you have the option of sharing your slideshow through Facebook, MySpace, Twitter, email, embed in a blog, or downloading the file.  In order to download the slideshow, you have to upgrade to a premium membership, which costs $3 per month.  

Here is my final slideshow.
Kaia and the Ducks on Photo Peach

Saturday, January 8, 2011

BP3_iGoogleScreenShots

Here is my homepage.


Here is my FSO page.


Here is my CBR page.


Here is my ETC page.


BP2_Wikispaces

 I chose to create a Wiki at www.wikispaces.com.  This site allows anyone to create a wiki including groups, corporations, and educators.


Educators get a free upgraded wiki for use in the classroom.  This wiki allows the administrator create accounts without linking the memberships to email addresses.  The other benefit of this site is the private setting and the ability to open student accounts in batches.


Once the account is created, the wiki name becomes the website address and takes you to a welcome screen.


The wiki pages and themes are created and edited through the Manage Wiki screen.  This screen is the main portal for editing all parts of the wiki.  From here you can edit the page layout, color schemes, and add a photo or logo.  Files can be uploaded and added to pages.


Discussion posts can be created easily to promote collaboration within the class.  Any member of the wiki can create a new post.  


Members are added through the User Creator menu.  Here you can add a list of students by typing into the text box or uploading a pre-created class list in Excel.  On the next screen, you can generate user names, and passwords.  User names need to be creative because the program will not allow duplicate user names including names of anyone registered through the main Wikispaces site.  


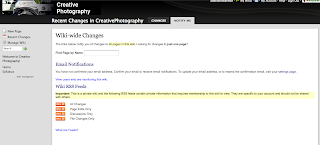
The site administrator can monitor any changes made to pages through the Recent Changes menu and through RSS feeds.


This site can be used to create an online classroom environment outside of the classroom.  Students can access class information from anywhere and contribute to class discussions.  The controls and layout were similar to the Blackboard.  The Wikispaces program used the same organizational patterns to link the pages.
 

Tuesday, January 4, 2011

BP1_Welcome to my Blog


Welcome to my first blogs posting.  I hope everyone has enjoyed spending extra time with their families over the holiday break.  It feels like I have been eating, sleeping, and socializing continuously for the last couple of weeks.  I have thoroughly enjoyed having the time to spend with my friends and family.  The time off has given me a chance to rejuvenate and reflect in preparation for the coming spring months.   I am excited for the upcoming experiences. 

Though it was nice to have a break, I am anxious to get started again working through this program.  I plan on updating this blog as I continue on my journey.